

Introduction
Learning how to use a tattoo machine is one of the most significant steps any aspiring tattoo artist will take. It marks the transition from theory to hands-on practice, and it is a process that demands patience, precision, and a genuine respect for the craft. Many beginners make the mistake of rushing into tattooing skin before they truly understand how the machine works, what its components do, and how each adjustment affects the final result. That rush leads to inconsistent lines, blown-out ink, and in worst cases, lasting skin damage.
This guide exists to prevent that. Whether you have just purchased your first tattoo machine kit or you are a hobbyist looking to build a stronger foundation, this article will walk you through everything you need to know. From understanding how the machine operates to setting up your workstation, from adjusting voltage to building your first line, this is the complete beginner’s guide to using a tattoo machine.
7 Key Things Every Beginner Must Know About Tattoo Machines
Before you plug anything in, there are seven foundational concepts that every beginner should understand. These are not optional background knowledge. They are the difference between progressing quickly and spinning your wheels for months.
First, tattoo machines do not work by pushing ink into skin. They work by puncturing the skin thousands of times per minute and depositing ink into the dermis layer beneath the surface. Understanding this changes how you approach needle depth, pressure, and speed.
Second, there are two main types of tattoo machines. Coil machines are traditional electromagnetic devices that deliver a harder, more tactile hit. Rotary machines use a motor to drive the needle in a smoother, quieter motion. Beginners often find rotary machines more forgiving.
Third, voltage controls speed. The higher the voltage, the faster the needle moves. Most outlining work happens between 7 and 9 volts, while shading and color packing may range from 6 to 8 volts depending on the machine and needle configuration.
Fourth, needle depth matters more than almost any other variable. Too shallow and the ink will not set. Too deep and you risk blowouts, where ink spreads beneath the skin and creates fuzzy, undefined lines.
Fifth, practice on fake skin before touching a person. Synthetic practice skin is affordable and mirrors real skin well enough to build genuine muscle memory.
Sixth, hygiene is not negotiable. Cross-contamination in tattooing can cause serious infections. Everything that touches a client must be sterile or single-use.
Seventh, your machine is only as good as your technique. Even the most expensive setup will produce poor results without consistent hand pressure, proper speed, and controlled movement.
Understanding Your Tattoo Machine and Its Components
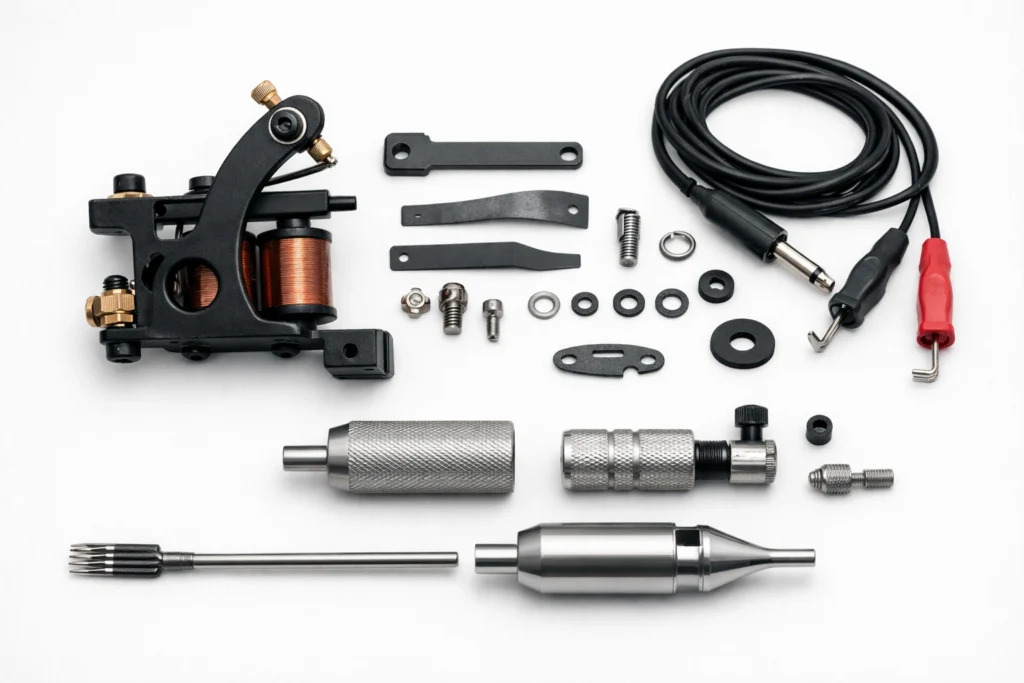
A tattoo machine is made up of several core components that work together to drive a needle in and out of the skin rapidly. Understanding what each part does will help you troubleshoot problems, make better adjustments, and care for your equipment properly.
The Frame
The frame is the body of the machine. It holds everything together and comes in different materials, typically iron, aluminum, or brass. The weight and balance of the frame affect how comfortable the machine feels during long sessions.
The Coils or Motor
In a coil machine, two electromagnetic coils alternate between attracting and releasing the armature bar. This creates the up-and-down needle motion. In a rotary machine, a small electric motor rotates a cam or eccentric wheel to drive the needle. The motor-driven mechanism is quieter and produces less vibration.
The Armature Bar and Spring
In coil machines, the armature bar sits on top of the coils and moves up and down rapidly when electricity flows through the coils. The front and rear springs attached to it control tension and the return speed of the needle.
The Needle and Tube
The needle is grouped into configurations depending on the task. Liner needles are arranged in tight circular groups, such as a 3RL or 5RL, designed to create clean, sharp outlines. Shader needles, like a 7M1 or 9M1, are arranged in curved or flat rows to pack in color and create smooth shading.
The tube holds the needle in place and acts as a grip. Disposable tubes are the standard in professional and hygienic practice.
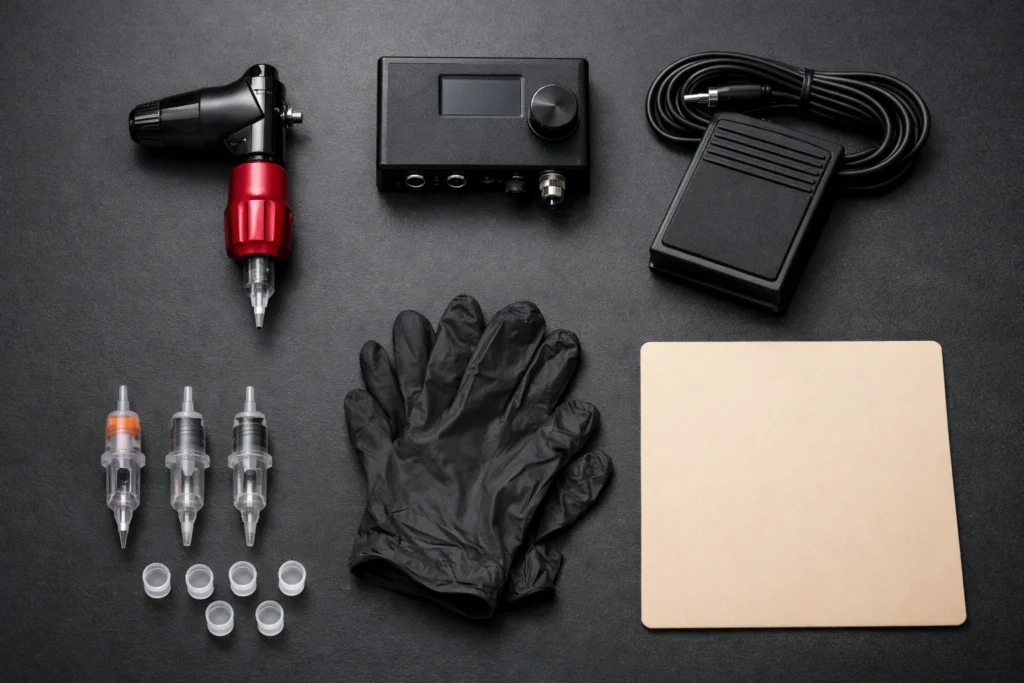
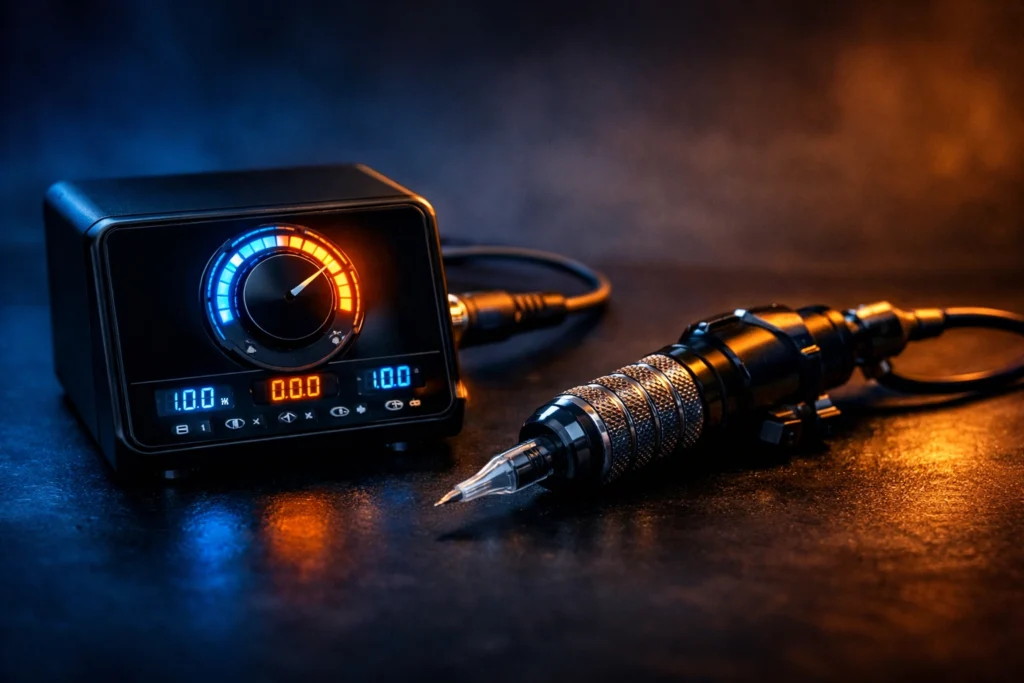
The Power Supply and Clip Cord
The power supply delivers adjustable voltage to the machine. A quality power supply lets you fine-tune voltage with precision. The clip cord connects the machine to the power supply, and the foot pedal controls when the circuit is active, letting you start and stop the machine without setting it down.
How To Assemble and Set Up Your Tattoo Machine
Assembling your machine correctly before each session is a step that cannot be rushed. A loose needle or poorly seated tube will cause problems the moment you begin.
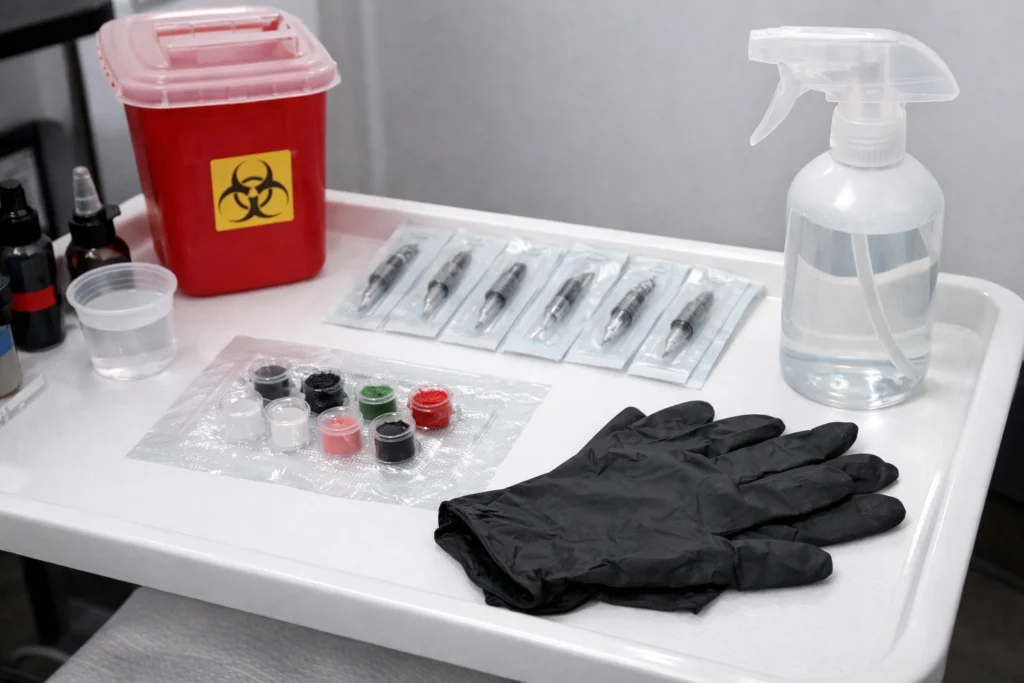
Step 1: Sterilize Your Workspace
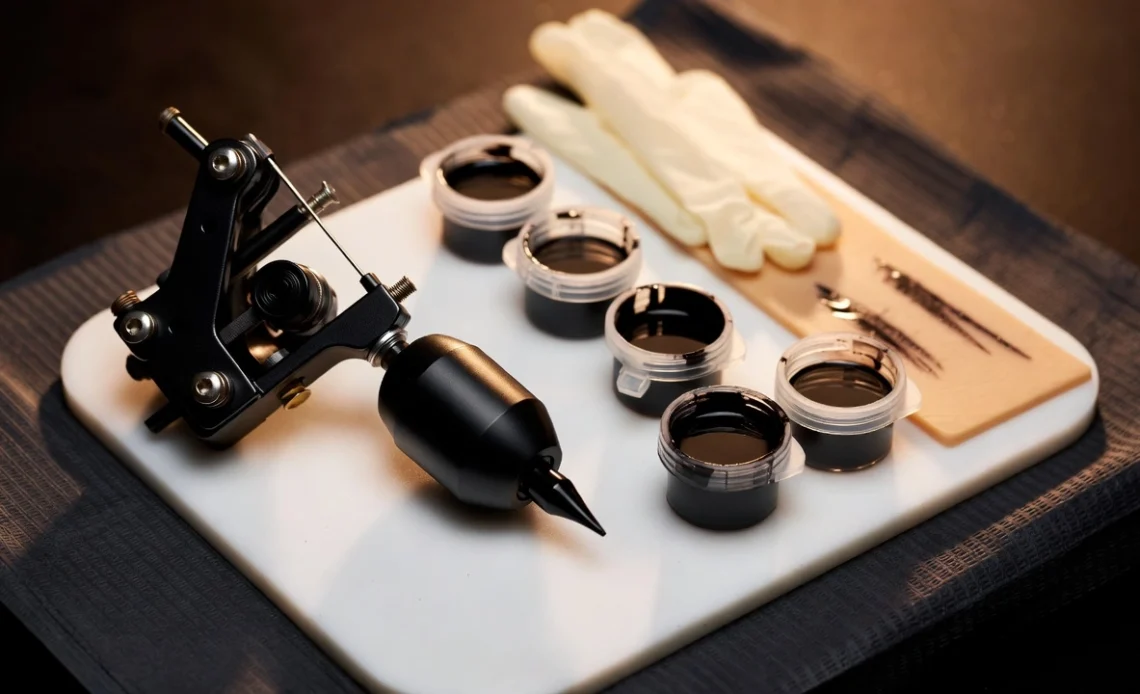
Wipe down your entire workstation with a hospital-grade disinfectant. Lay out your disposable materials, including gloves, ink caps, and needle cartridges or needle and tube combinations. Set up a sharps container nearby for used needles.
Step 2: Insert the Needle
If you are using a traditional setup rather than cartridges, carefully thread the needle bar through the tube. Ensure the needle grouping extends past the tube tip by the appropriate amount, typically one to two millimeters for most work. Lock it in place according to your machine’s mechanism.
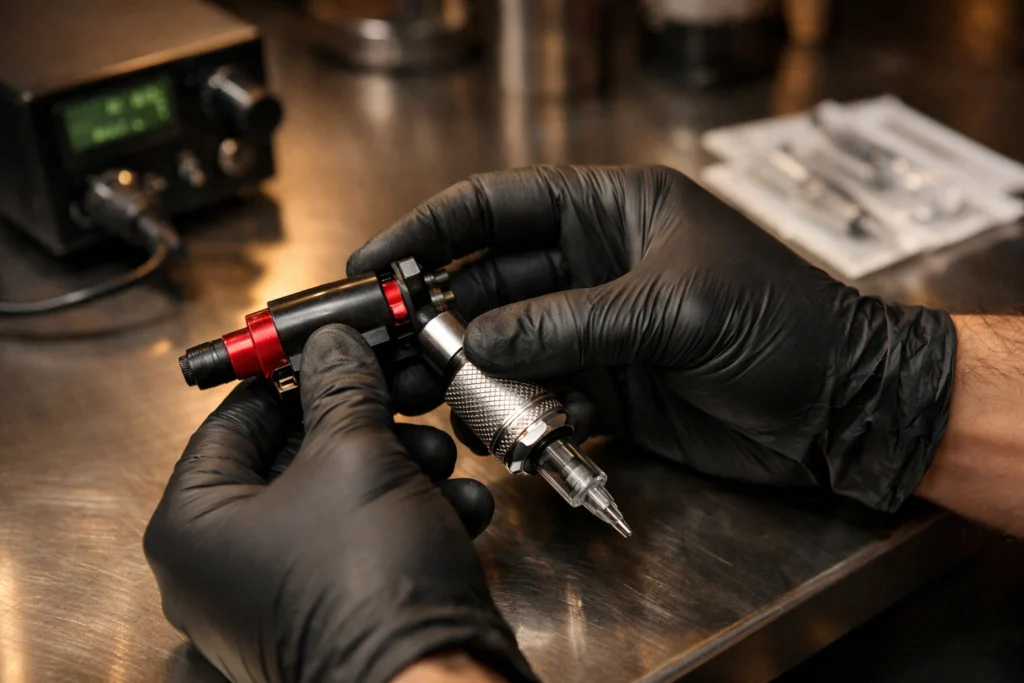
If you are using a cartridge machine, simply press the cartridge into the grip until it clicks into place. Cartridge systems have made setup significantly more straightforward for beginners.
Step 3: Secure the Tube or Grip
Tighten the grip into the machine’s vice or collet securely. A tube that wobbles during tattooing will throw off your control and cause uneven lines.
Step 4: Connect the Clip Cord and Power Supply
Attach the clip cord to the machine’s binding post and connect the other end to the power supply. Plug in the foot pedal. Turn on the power supply and set your starting voltage. For outlining, begin around 7 volts. You can adjust from there once you test on practice skin.
Step 5: Fill Ink Caps and Apply Vaseline
Pour small amounts of ink into disposable ink caps. Never dip your needle directly into ink bottles. Instead, use the cap as your working reservoir. Apply a thin layer of petroleum jelly to your practice skin or client’s skin to help the needle glide and reduce surface friction.
Setting the Correct Needle Depth
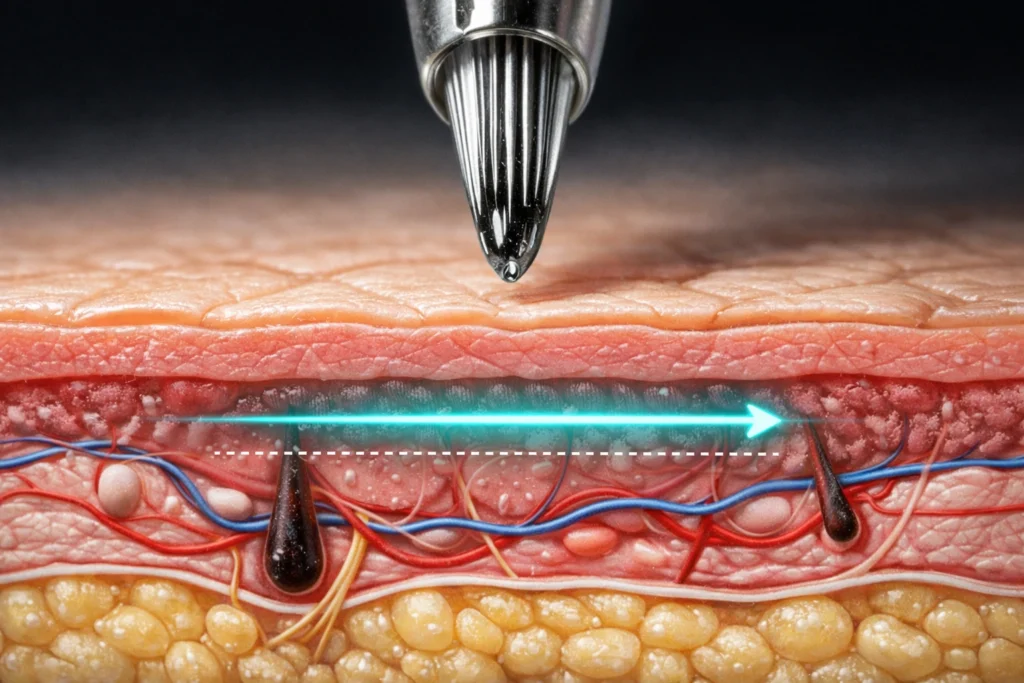
Needle depth is one of the most critical and most misunderstood variables in tattooing. The goal is to deposit ink in the dermis, which sits just below the epidermis. The dermis is approximately one to two millimeters beneath the skin surface.
How to Check Needle Depth Visually
On synthetic practice skin, a correctly set needle should leave a clean deposit of ink with no excessive tearing or dragging. If the needle is too shallow, ink will wipe away when you remove excess from the surface. If it is too deep, you will see the skin puckering and the lines will appear raised or blurry.
Adjusting Depth on Different Machine Types
On coil machines, depth is adjusted by changing the distance between the needle tip and the tube tip, often called needle protrusion. On many rotary machines, an adjustable grip or the cartridge system itself controls how far the needle extends.
A common starting point for needle protrusion is approximately 1.5 millimeters. From there, adjust based on what you observe on practice skin.
Voltage and Speed Settings for Different Techniques
Getting your voltage right is a process of calibration rather than following a single universal number. Every machine behaves differently, and skin varies between individuals.
Outlining Voltage
For creating crisp, solid outlines, most artists work between 7 and 9 volts. Higher voltage drives the needle faster, which can be helpful for single-pass line work, but it requires a steady hand. Lower voltage gives you more control but may require multiple passes.
Shading and Color Packing Voltage
Shading typically works best at slightly lower voltages than lining, often between 6 and 8 volts, because the wider needle groupings are already covering more surface area per pass. Moving too fast with a shader can create uneven coverage.
Listening to Your Machine
Experienced artists often talk about the sound of a properly tuned machine. A well-set coil machine produces a consistent, rhythmic buzz. If your machine sounds choppy or strained, either the voltage is too low or the springs need adjustment. A machine that sounds overwhelmed or overheated is running too hot.
Basic Tattooing Techniques for Beginners
With your machine assembled, your voltage set, and your practice skin ready, it is time to work on technique. The fundamentals you build during this stage will shape the quality of your work for years.
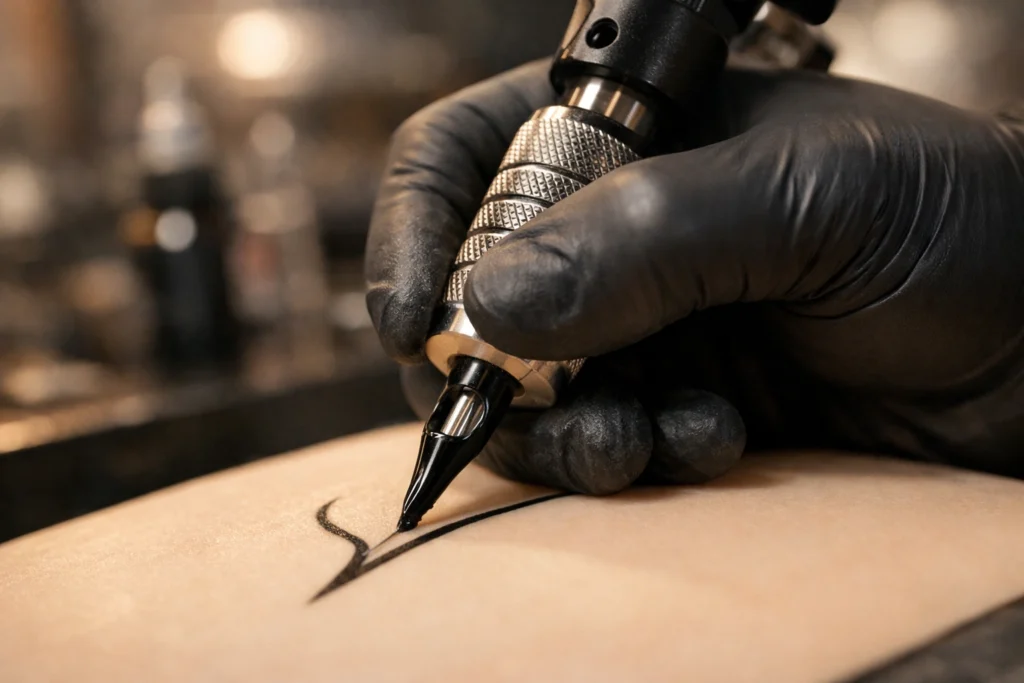
How To Hold the Tattoo Machine
Hold the machine like you would a pencil, with the grip resting between your thumb and index finger and your remaining fingers providing stability. Your grip should be firm but relaxed. Tension in your hand transfers to the needle and creates shaky lines.
The Art of Outlining
Press the foot pedal to activate the machine. Dip the needle tip into your ink cap, picking up a small amount of ink. Place the needle against the skin at the start of your line and pull the machine toward you at a consistent speed. The machine should be held at roughly a 45-degree angle to the skin surface.
Move at a steady pace. Moving too slowly burns the skin and causes excessive trauma. Moving too quickly deposits ink inconsistently. Practice on synthetic skin until you can produce a line of consistent width and darkness from start to finish.
Shading Techniques
For soft shading, use circular or whip-shading motions with a curved magnum needle. Work outward from the darkest areas to lighter ones, gradually reducing pressure and speed. For solid black fill, use back-and-forth strokes with a flat or round magnum, overlapping each pass slightly.
Stretching the Skin
Proper skin stretching is essential. Use your non-dominant hand to pull the skin taut in the direction opposite your needle movement. Loose skin causes the needle to drag and skip, leading to patchy, inconsistent results. On practice skin, use your fingers to hold the material flat.
Safety, Hygiene, and Professional Standards
No matter how skilled you become with a tattoo machine, safety and hygiene are the non-negotiable foundation of the craft.
Always wear nitrile gloves throughout the entire session. Never reuse needles. Use single-use ink caps and dispose of them after each session. Wipe excess ink from the skin regularly with a clean, disposable paper towel rather than a reusable cloth.
If you are tattooing another person rather than practicing alone, ensure your workspace meets all local health and safety regulations. Many regions require licensing, proper sterilization equipment, and specific facility standards.
Clean your machine thoroughly after each session using approved disinfectants. Protect the machine body with a disposable machine cover or barrier wrap during sessions to prevent cross-contamination.
Conclusion
Learning how to use a tattoo machine is a journey that rewards patience, consistency, and genuine respect for the craft. There is no shortcut through the fundamentals. The artists who build lasting careers are the ones who understood their equipment deeply before they ever touched living skin, who practiced relentlessly on synthetic skin until their lines were clean and their shading was smooth, and who never cut corners on safety or preparation.
Take the time to understand your machine’s components, learn how voltage and needle depth interact, and develop your technique through hundreds of hours of deliberate practice. The machine is a tool. What you produce with it is a reflection of the discipline and care you bring to every session. Start slow, stay consistent, and the craft will reveal itself to you one precise line at a time.
You may also like this post: 16 Design Your Own Tattoo Easily With This Powerful AI Tool
Frequently Asked Questions
What voltage should I use for outlining with a tattoo machine?
Most beginners and experienced artists alike start outlining between 7 and 9 volts. The exact setting depends on the machine, needle type, and skin condition. Start at 7.5 volts and adjust based on how the ink is depositing on practice skin before moving to a client.
How deep should the tattoo needle go into the skin?
The needle should penetrate into the dermis, which sits approximately 1 to 2 millimeters below the skin surface. A depth of around 1.5 millimeters is a common starting point. Too shallow means ink will not hold; too deep causes blowouts and excessive trauma.
What is the difference between a coil and a rotary tattoo machine?
A coil machine uses electromagnetic coils to drive the needle with a harder, more traditional hit. A rotary machine uses a motor to move the needle in a smoother, quieter motion. Rotary machines are generally easier for beginners to control because they produce less vibration and noise.
How long should I practice on fake skin before tattooing a person?
There is no fixed timeline, but most experienced artists recommend months of consistent practice on synthetic skin before tattooing another person. You should be able to produce clean, consistent outlines and smooth shading without excessive passes or skin trauma before moving to human skin.
How do I keep my tattoo machine from overheating?
Overheating is usually caused by running the machine at excessively high voltage for extended periods or having mechanical friction within the components. Take regular breaks during long sessions, keep voltage within the appropriate range for your machine, and ensure the moving parts are properly lubricated according to the manufacturer’s guidance.